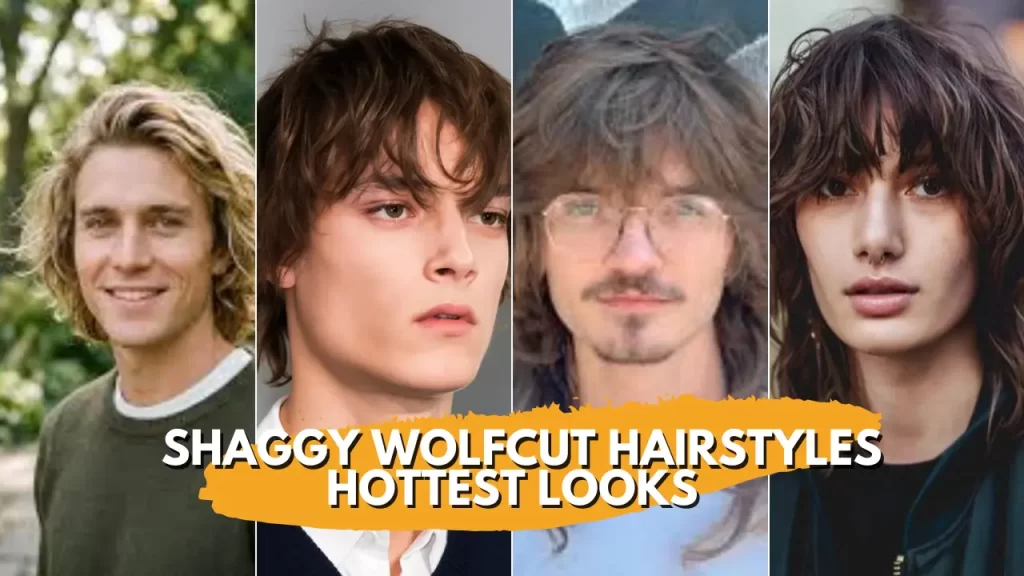
40 Best Shaggy Wolfcut Hairstyles for Men
40 Best Shaggy Wolfcut Hairstyles for Men
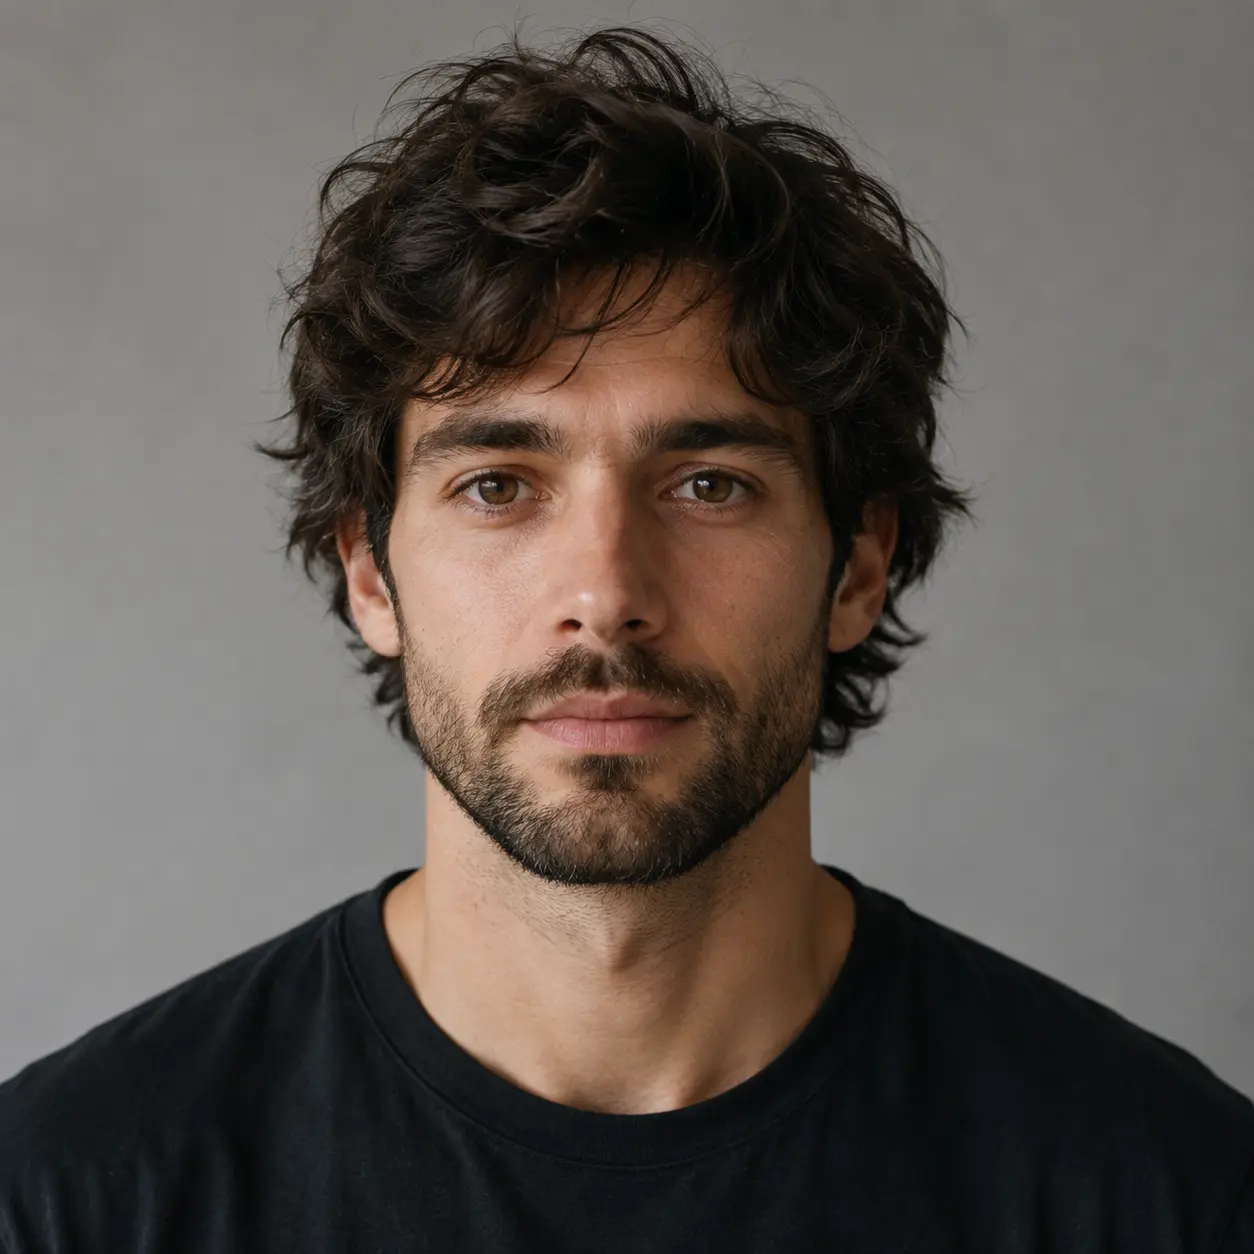
If the regular wolfcut is bold, the shaggy wolfcut turns the dial up two more notches.
It’s heavier, wilder, and more textured. It has that raw, unfinished energy that somehow looks like you spent exactly zero seconds on it — even though it’s one of the most technically involved cuts a barber can do.
This guide covers the hottest shaggy wolfcut styles for men.
Every single style below comes with a dedicated Barber Note and a Styling Tip so you walk in knowing exactly what to ask for and walk out knowing exactly what to do.
What Is a Shaggy Wolfcut? (And How It’s Different From a Regular Wolfcut)
A shaggy wolfcut takes the layered, textured structure of a standard wolfcut and pushes it further into messy, undone territory.
Where a regular wolfcut can be styled clean or messy depending on the day, the shaggy wolfcut is built to look lived-in. The layers are choppier, the ends are wispier, and the whole silhouette reads more retro rock-and-roll than modern streetwear.
Think of it this way: a wolfcut is a canvas. A shaggy wolfcut is what happens when someone scribbles all over that canvas and it somehow looks incredible.
The 4 Things That Make a Wolfcut Shaggy
- Razor cutting instead of scissors — a razor blade creates soft, feathered ends that scissors simply cannot replicate. The difference is immediately visible up close.
- Point cutting throughout — the barber holds sections vertically and cuts into the ends at an angle, creating irregular tips that move independently.
- Interior thinning — thinning shears or a razor are worked through the mid-shaft, not just the ends, which removes internal weight and lets the layers breathe.
- Disconnected layering — the layers are not blended smoothly into each other. They’re intentionally left with visible contrast between sections, which gives the shaggy look its characteristic depth.
Most wolfcut articles skip this entirely.
If you walk into a barbershop and ask for a shaggy wolfcut without knowing this, you might walk out with a regular layered cut that just looks a little messy — not the actual shaggy texture you wanted.
40 Best Shaggy Wolfcut Hairstyles for Men
Every style below includes a Barber Note — what to say in the chair — and a Styling Tip — what to do once you’re home. Read both before you book your appointment.
Shaggy Wolfcuts by Length
1. Classic Shaggy Wolfcut
The foundation of everything on this list. Medium length all over with disconnected layers, razor-feathered ends, and soft curtain bangs or a wispy fringe.
This is Level 3 on the shaggy scale — enough texture to look intentional, not so much that it becomes unmanageable.
✂ Barber Note: Ask specifically for razor-cut ends throughout the entire head, not just the tips. Request interior thinning from mid-shaft on every section, and point-cut layering through the crown. Tell your barber you do NOT want the layers blended smoothly into each other — the disconnection is the whole point.
2. Short Shaggy Wolfcut
All the shaggy wolfcut personality in a more compact package.
The layers sit tighter to the head, the ends are still razor-feathered, and the silhouette is more contained. A perfect entry point for guys trying the shaggy wolfcut for the first time.
✂ Barber Note: Concentrate the layering on the crown section only. Ask for a razor pass on all the ends but keep the sides slightly fuller than you normally would — at short lengths, thin sides make the head look narrow. Check the crown shape from above before leaving the chair.
3. Long Shaggy Wolfcut
This is where the shaggy wolfcut reaches its full potential. Long layers cascade past the ears and sometimes to the shoulders with heavy interior thinning that lets everything move freely.
It is the rockstar version and looks best when actively neglected.
✂ Barber Note: Interior thinning becomes non-negotiable at longer lengths. Without it the hair sits flat and heavy no matter how good the surface layers look. Ask your barber to work the thinning shears through the entire mid-shaft section on every panel, not just the crown. Also request feathered ends on the very tips for that wispy long-hair finish.
4. Medium-Length Shaggy Wolfcut
The most versatile length for a shaggy wolfcut. Long enough to show off the layering properly, short enough to stay lightweight and manageable.
It frames the face naturally and sits in a comfortable maintenance zone between the short and long versions.
✂ Barber Note: Medium length is the easiest canvas for a barber to execute this cut correctly — the layers have room to be properly disconnected without the weight management challenges of longer hair. Ask for a razor pass on all ends and point-cutting through the entire crown. If you have curtain bangs or a fringe, ask for those to be feathered at the tips to match the shaggy texture of the rest.
5. Mini Shaggy Wolfcut
Short enough that the cut barely reaches the tops of the ears, yet still fully layered and razor-edged through the crown.
It is a great option for guys transitioning into longer styles or those with stricter dress codes who still want modern texture.
✂ Barber Note: At this length the shaggy quality comes almost entirely from the razor work on the ends and the crown layering. The sides should stay slightly fuller than a regular short cut or the proportions can look off. Ask your barber to check the silhouette carefully from both the front and sides before finishing.
Shaggy Wolfcuts by Hair Texture
6. Curly Shaggy Wolfcut
Possibly the best combination in this entire list. Natural curls plus razor-cut layers create an explosion of defined, bouncy texture that looks completely effortless.
The shaggy wolfcut removes the weight that makes curly hair sit flat, letting each curl move independently.
✂ Barber Note: Never razor-cut tightly coiled curls when dry — always cut on damp or wet hair. The razor should be used on the ends and mid-shaft only, never at the roots where curls are most fragile. Ask your barber directly whether they have experience with razor cuts on curly hair before booking — not every barber does, and a bad razor cut on curls takes a long time to grow out correctly.
7. Wavy Shaggy Wolfcut
Wavy hair is the most cooperative texture for a shaggy wolfcut. The waves naturally enhance the movement between layers and the feathered ends fall into place without much intervention. The whole thing just works.
✂ Barber Note: Ask for layers cut on the bias — at a diagonal rather than horizontal angle — which encourages the waves to move outward rather than straight down, creating significantly more volume and dimension. Also request a razor pass on the very ends to feather them rather than cut them blunt.
8. Straight Hair Shaggy Wolfcut
Straight hair requires the most styling work of any texture because the shaggy quality doesn’t reinforce itself naturally. But when done correctly, the clean lines of straight hair make the disconnected layers look incredibly precise and intentional.
✂ Barber Note: Razor cutting is especially critical for straight hair — without it, straight layers look blunt and stacked rather than feathered and airy. Ask for razor work on the ends and a generous amount of point cutting through the crown and mid-lengths. Also request interior slide cutting along the length to add texture that straight hair wouldn’t otherwise have.
9. Thick Hair Shaggy Wolfcut
Thick hair and the shaggy wolfcut are natural allies. Interior thinning removes the excess bulk that would make the cut look shapeless, and razor ends prevent the puffed-out rounded silhouette that thick hair creates without proper layering.
✂ Barber Note: Be very explicit with your barber: go heavy on the interior thinning, especially through the crown and sides. Don’t be afraid of them taking a lot of weight out — the shaggy wolfcut requires this removal to sit correctly on thick hair. Ask them to look at the crown shape from directly above to ensure it’s not rounding out into a mushroom. A second thinning pass is sometimes needed on very thick hair.
10. Thin Hair Shaggy Wolfcut
Fine hair can absolutely pull off a shaggy wolfcut, but the approach must be different. The goal is to create the illusion of texture and thickness using the layering itself rather than removing bulk that thin hair doesn’t have.
✂ Barber Note: Skip the heavy interior thinning entirely. Instead ask for face-framing layers only and a gentle razor pass on the ends to create feathering without removing volume. The layers should be adding bulk, not taking it away. Keep the overall length on the longer side — longer layers on thin hair look fuller than short stacked layers do.
Shaggy Wolfcuts With Bangs
11. Shaggy Wolfcut With Curtain Bangs
The most popular pairing in 2026. Curtain bangs part down the middle and sweep naturally to each side, creating a face-framing effect that’s flattering on almost every face shape. On a shaggy wolfcut the bangs blend naturally into the front layers rather than sitting as a distinct separate section.
✂ Barber Note: Tell your barber the curtain bangs must be feathered at the ends using a razor or point-cutting technique to match the rest of the shaggy texture — blunt-cut curtain bangs on a shaggy wolfcut look completely disconnected from the rest of the style. The bang length should hit between the eyebrow and the cheekbone for maximum face-framing effect.
12. Shaggy Wolfcut With Heavy Fringe
A full, dense fringe sitting across the forehead creates a strong visual contrast against the airy, wispy layers of the shaggy wolfcut behind it. The weight of the fringe anchors the front of the style while the rest of the hair does whatever it wants.
✂ Barber Note: The fringe should be cut blunt — not feathered — to provide contrast against the shaggy layers. Ask your barber to keep it dense by cutting it as a solid section rather than thinning the interior. A wispy fringe plus wispy layers everywhere else removes all structure from the style and it reads as just messy rather than intentionally textured.
13. Shaggy Wolfcut With Micro Bangs
Not for everyone, but absolutely striking when it works. Micro bangs sit just below the hairline, high on the forehead. Combined with the wild layered texture of the shaggy wolfcut, it creates one of the most fashion-forward men’s hairstyles available in 2026.
✂ Barber Note: Micro bangs require very precise cutting — even a few millimetres too long or too short changes the whole effect. Ask your barber to cut them in small increments, checking after each pass. Also warn them upfront that micro bangs grow out faster than any other element of the wolfcut and you’ll likely need a fringe trim every 3–4 weeks between full cuts.
14. Shaggy Wolfcut With Side-Swept Fringe
A fringe swept dramatically to one side creates an asymmetric shape that gives the shaggy wolfcut a slightly editorial, dramatic quality. It softens the forehead and draws attention to the eyes on the swept side.
✂ Barber Note: Ask your barber to cut the fringe slightly longer on the sweeping side — a millimetre or two — so it falls naturally in the direction you want without constant re-styling. The transition from the fringe into the shaggy layers on the side should be feathered, not a hard line.
15. No-Bangs Shaggy Wolfcut
All the shaggy texture and layering with the forehead completely clear. A great option for guys who don’t suit bangs, who prefer a cleaner frontal look, or who simply want to push all the attention onto the layers and volume rather than the face frame.
✂ Barber Note: Without bangs, the face-framing layers become the most important element of the cut. Ask your barber to bring some shorter layers forward around the temples — these act as a soft frame without a defined bang. Make sure the front hairline is cleaned up at the end of the appointment.
Shaggy Wolfcuts With Fades
16. Shaggy Wolfcut With Taper Fade
A taper fade on the sides and back anchors the wild shaggy texture above it, creating a sharp contrast that reads as intentional and modern. The fade gives the barbershop polish that stops the overall look from tipping into unkempt territory.
✂ Barber Note: The transition from the fade into the shaggy layers should be gradual rather than abrupt. A hard disconnect between a skin fade and heavy shaggy layers can look like two completely separate haircuts on one head. Ask for a soft blend zone of about half an inch between where the fade ends and the shaggy section begins. The fade itself should finish clean at the neckline.
17. Low Fade Shaggy Wolfcut
The low fade starts just above the ears and near the neckline, keeping the most hair on the sides. It suits guys who want the shaggy wolfcut to feel fuller and less structured than a high or mid fade would create.
✂ Barber Note: A low fade pairs best with a shaggy wolfcut that has more volume on the sides rather than a very tight shaggy top. Ask your barber to keep the fade line just above the ear rather than letting it creep up — a low fade that climbs too high turns into a mid fade and changes the proportions entirely. The neckline should be squared off cleanly.
18. Mid Fade Shaggy Wolfcut
Hits at the midpoint of the sides and creates a very balanced look — equal proportion between the clean faded sides and the shaggy top. It’s the most popular fade option combined with the wolfcut and photographs well on virtually every face shape.
✂ Barber Note: The mid fade creates the strongest visual separation between the structured sides and the shaggy top, which means the shaggy layers need to have real volume to justify the contrast. Ask your barber to ensure the crown section has enough height after cutting — if the shaggy top sits flat, the whole cut looks deflated against the clean fade.
19. Burst Fade Shaggy Wolfcut
The burst fade arcs around the ear in a curved shape rather than a straight horizontal line. This sculptural element makes the shaggy wolfcut look genuinely artistic and unique, especially when the shaggy layers above it have full volume.
✂ Barber Note: A burst fade requires a more skilled hand than a standard fade — the curve around the ear needs to be consistent on both sides or the asymmetry looks like a mistake rather than a deliberate style choice. Book with a barber who has a portfolio of burst fade work specifically. The burst should frame the ear rather than sit above or below it.
20. Shaggy Wolfcut With Undercut
A shaved or very close-cropped undercut beneath the shaggy layers creates the most dramatic contrast of any side treatment. The full disconnection between the two lengths is visible when the hair moves, adding a structural element that makes the shaggy top look even more voluminous by comparison.
✂ Barber Note: Ask for a hard disconnection undercut only if you’re fully committed to the aesthetic — it can’t be disguised easily and grows out noticeably within 2 weeks, requiring regular maintenance. The undercut line should be set at a natural parting point so the shaggy layers fall over it when styled down, revealing it as the hair moves.
Cultural and Aesthetic Shaggy Wolfcuts
21. Korean Shaggy Wolfcut
The Korean interpretation is more refined than the Western version. Softer razor work, face-framing curtain layers, a slightly fluffier blow-dry finish, and overall cleaner lines. It sits at Level 2 on the shaggy scale — enough texture to be interesting, polished enough to look intentional and fashion-forward rather than wild.
✂ Barber Note: Korean shaggy wolfcuts use more blending between layers than the Western version — ask for the shaggy texture to be present at the ends and in the face-framing pieces only, with the rest of the layers connected more smoothly. The curtain bangs should be soft and rounded at the tips, not jagged. This is a precision cut that requires a patient barber.
22. Japanese Shaggy Wolfcut
Ultra-precise layering with an almost architectural quality. The Japanese version is sharper and more geometric than either the Korean or Western interpretations. The shaggy elements are deliberate and highly controlled rather than wild — each disconnected layer looks placed rather than happened.
✂ Barber Note: Japanese-style cuts require exceptional precision from your barber. Ask specifically for geometric layer placement — each section should have a clear, visible edge rather than a soft, feathered boundary. The razor work should be used minimally and precisely on selected sections rather than throughout the whole head. This is not a cut to rush.
23. Asian Shaggy Wolfcut
A broader category that works with naturally thick, straight Asian hair to create maximum layer contrast. The dark color of most Asian hair makes the disconnected layer depth especially visible and visually striking, which means the cut speaks for itself even on the most understated styling days.
✂ Barber Note: Asian hair texture tends to be very thick and resistant to layering — ask your barber to do a generous interior thinning pass specifically through the crown, which is where Asian hair tends to build up the most mass. The razor work on the ends is crucial for giving the naturally heavy ends a feathered, airy finish they wouldn’t otherwise have.
24. 70s Shaggy Wolfcut
Deep side parts, very heavy layering, a full fringe, and a lot of length. This is the direct descendant of the original 1970s shag, updated with modern razor techniques. It sits at Level 4 on the shaggy scale and pairs perfectly with vintage denim and any oversized shirt with a wide collar.
✂ Barber Note: Ask for layers starting at the crown and cascading all the way to the ends with no tapering or tightening at the sides — the 70s shag is uniform in its wildness from every angle. A razor throughout the entire cut is essential. The fringe should be heavy and cut horizontally across the forehead, not point-cut or feathered, to give it that iconic 70s density.
25. Grunge Shaggy Wolfcut
90s Seattle energy translated into 2026. Unkempt by design, heavily layered, often dark brown or black, and styled with the bare minimum. This is Level 5 on the shaggy scale. It looks incredible with an oversized flannel shirt and absolutely no hair product whatsoever.
✂ Barber Note: Tell your barber to go as disconnected and irregular as possible with the layers — no attempt to balance or tidy the shape. The more deliberately uneven the layer contrast, the more authentic this version reads. Ask for a razor throughout and specifically request that the ends be left visibly frayed rather than neatened up.
26. Emo Shaggy Wolfcut
Side-swept bangs, longer face-framing pieces, heavy layers throughout, and almost always a dark base color. The emo shaggy wolfcut leans into the mid-2000s aesthetic but feels genuinely fresh in 2026 because of the nostalgia cycle working powerfully in its favor.
✂ Barber Note: Ask your barber to keep the side-swept bangs longer than they look comfortable with — emo bangs read wrong when they’re too short. They should reach past the eye on the swept side. Request heavy layering throughout with visible disconnection and a razor pass on the ends. The face-framing pieces at the front should be the longest layers on the top section.
27. Goth Shaggy Wolfcut
Maximum volume, maximum darkness. The goth shaggy wolfcut is typically jet black, extremely heavily layered, and styled for dramatic effect. No fades, no clean edges — just pure wild texture from scalp to tip with full commitment to the dark aesthetic.
✂ Barber Note: Ask for the fullest, most disconnected layering your barber is comfortable doing — this is Level 4 to Level 5 on the shaggy scale. No taper, no fade, natural hairline left as-is. The interior thinning should be very heavy to prevent the black hair from looking like one solid dark mass. Ask your barber to hold each section up to the light to check for visible layer separation before finishing.
28. Eboy Shaggy Wolfcut
Middle part, face-framing curtain layers, often two-tone or with peekaboo color underneath, styled relatively flat at the roots and wispy at the ends. The eboy version is one of the most photographed shaggy wolfcut variations on social media in 2026.
✂ Barber Note: The middle part needs to be trained rather than just placed — ask your barber to section it with a comb while wet and dry it in that direction. The face-framing layers should hit between the cheekbone and chin for maximum effect. Request razor feathering specifically at the face-framing pieces and the ends — the contrast between slightly smoother roots and wild ends is what defines the eboy shaggy wolfcut.
29. K-Pop Shaggy Wolfcut
Polished, fluffy, slightly shaggy at the ends. Inspired by fourth and fifth-generation K-pop groups who blend the wolfcut silhouette with a softer, more maintained texture. It’s Level 2 shaggy with a Level 5 style game — the craft is in the finish rather than the wildness.
✂ Barber Note: K-pop shaggy wolfcuts require a barber who understands the Korean approach to layering — soft blending between most sections with the shaggy texture reserved for the ends and the face-framing pieces only. Ask for curtain bangs that are rounded at the tips, not jagged. The overall shape should be full and fluffy when blown dry, not flat or spiky.
30. Skater Shaggy Wolfcut
Medium length, windswept, naturally sun-bleached or dyed in warm tones. The skater shaggy wolfcut is what happens when you get a great haircut and then spend six weeks outdoors not thinking about it at all. That grow-out period is actually the intended look.
✂ Barber Note: Ask for a cut at Level 3 on the shaggy scale — full razor ends and disconnected layers — then let it grow for 6–8 weeks before trimming. The grow-out naturally softens the edges and adds a lived-in quality that freshly cut hair can’t replicate. Ask your barber to cut it slightly longer than you want it to end up, since the skater version looks better with a bit of length.
31. Anime-Inspired Shaggy Wolfcut
Dramatic spiky layers radiating outward from the crown, usually with strong color — platinum, silver, or graphic black and white. It attempts to recreate the exaggerated hair of anime characters within the actual constraints of human hair. The closer you get, the more striking the result.
✂ Barber Note: Ask your barber for very aggressive disconnected layering with each section pointed outward rather than downward — this is what creates the radiating spike effect rather than layers that just fall. Also request significant interior thinning so the layers can actually hold their direction rather than drooping under their own weight. This cut often needs a styling step at home to complete the anime silhouette.
32. Modern Rockstar Shaggy Wolfcut
Long layers, maximum volume, wild and deliberate. This is the stage-ready version of the shaggy wolfcut — David Bowie’s Ziggy Stardust era energy channeled through 2026 Korean and Western street fashion simultaneously. It pairs beautifully with statement clothing and intentional accessories.
✂ Barber Note: Ask for Level 4 to Level 5 shaggy with full razor work throughout and heavy interior thinning to allow the long layers to move freely without collapsing. The crown section should have significant height when blown dry. Request a check from the front, sides, and back before leaving — the rockstar wolfcut needs to look good from every angle because it gets attention from every angle.
Specific Shaggy Wolfcut Combinations
33. Shaggy Wolfcut Mullet
The back is deliberately kept longer than a standard wolfcut — the mullet’s signature feature — while the top carries the full shaggy texture. It’s two retro styles merged into one unapologetically bold look. Level 4 on the shaggy scale and not for anyone who wants to stay under the radar.
✂ Barber Note: Ask your barber to keep the back at least 2–3 inches longer than the sides and crown. The transition from the shaggy top into the longer mullet back should be gradual rather than a hard step — ask for a blending zone through the occipital bone area. The back itself should have soft feathering at the tips rather than a blunt squared-off finish.
34. Beard and Shaggy Wolfcut Combo
A full beard paired with a shaggy wolfcut is one of the most striking masculine looks in men’s grooming right now. The rugged structure of the beard contrasts perfectly with the airy, wispy layers of the shaggy wolfcut — structure below, chaos above.
✂ Barber Note: Book a barber who can do both the haircut and the beard in the same appointment. Ask them to consider the beard and haircut as a single silhouette rather than two separate things. The face-framing layers of the wolfcut should complement the beard shape — if your beard is wide, lighter face-framing layers stop the overall look from being too wide. If your beard is narrow and pointed, fuller face-framing layers balance the width.
35. Shaggy Wolfcut for Oval Faces
Oval faces are the ideal canvas for a shaggy wolfcut. Almost every variation of the cut works — the balanced proportions of the oval face shape mean no single adjustment is critical. Curtain bangs, long layers, heavy fringes, and taper fades all suit oval faces equally well.
✂ Barber Note: Tell your barber your face shape is oval and that you’re open to any variation of the shaggy wolfcut. This gives them creative freedom to suggest the version that works best with your specific hair texture rather than being constrained by shape adjustments. The only thing to avoid is excessive width — even on an oval face, very wide side volume can push the overall silhouette out of proportion.
36. Shaggy Wolfcut for Round Faces
Focus volume on the crown and keep the layers on the sides falling downward rather than outward. Avoid adding width at the temples. A longer shaggy wolfcut works better than a short one for round faces because the length creates a visual elongation that the face shape benefits from.
✂ Barber Note: Ask your barber to keep the side layers falling downward and close to the face rather than flicking outward. The crown section should have maximum height — request that the interior thinning is concentrated here to allow the crown layers to lift. A longer fringe or no fringe at all works better than a short fringe, which can make a round face look shorter.
37. Shaggy Wolfcut for Square Faces
The wispy, soft layers of the shaggy wolfcut naturally soften a strong square jaw. Curtain bangs are especially effective here — they soften the forehead and redirect attention to the eyes. Medium length works better than very short, which tends to accentuate rather than soften strong jaw angles.
✂ Barber Note: Ask your barber to bring more layering forward around the face — specifically around the cheekbone area — to soften the jaw by drawing attention upward. The shaggy ends around the chin level are particularly effective for square faces. Avoid very short, blunt-layered versions that sit above the jaw, which only highlight the jaw’s width.
38. Wet Look Shaggy Wolfcut
Apply a glossy wet-look gel through the shaggy layers for a completely different aesthetic from the standard version. The layers are still visible beneath the slicked surface, creating a sleek-but-textured combination that looks incredibly editorial.
✂ Barber Note: This is a styling choice rather than a cut variation, so the underlying cut should be your preferred shaggy wolfcut at whatever length you like. Tell your barber you plan to style it wet-look sometimes — this means keeping the layers particularly clean and well-defined so they show through the gel rather than disappearing under it.
39. Tousled Shaggy Wolfcut
The most effortless version on this list. Air-dried, finger-styled, and product-light. The tousled shaggy wolfcut looks like you rolled out of bed looking exactly like this. That’s the goal — and the cut does 95% of the work without you lifting a finger.
✂ Barber Note: Ask for the classic Level 3 shaggy wolfcut — full razor ends, disconnected layers, interior thinning — then specifically request that the barber cuts everything slightly longer than you think you want. The tousled version looks best with a bit of extra length that allows the layers to fall loosely rather than springing upward.
40. Fluffy Shaggy Wolfcut
Blow-dried upside down for maximum volume and softness. The fluffy shaggy wolfcut is cloud-like, bouncy, and warm rather than edgy. It leans more K-pop than grunge but still carries the full shaggy layer depth underneath the volume.
✂ Barber Note: Ask for a Level 2 to Level 3 shaggy cut — the fluffy finish needs layers that are properly disconnected but not so chaotic that blow-drying creates frizz rather than volume. The interior thinning should be thorough to allow the layers to lift fully during drying. Request that the ends are lightly razor-feathered rather than heavily frayed for a softer finish.
Shaggy Wolfcut vs Regular Wolfcut:
Both cuts share the same wolf-inspired DNA — layers, volume at the crown, and that effortless rocker energy — but they diverge significantly in execution and feel.
Cutting & Texture
The regular wolfcut is crafted entirely with scissors, giving it smoother, more blended layers.
The shaggy wolfcut uses a razor alongside scissors, which creates raw, disconnected texture with visible contrast between layers and very wispy, irregular ends. Interior thinning is heavier in the shaggy version, making it ideal for people with thick hair.
Styling & Maintenance
The regular wolfcut takes about 5–10 minutes to style daily, while the shaggy wolfcut needs almost no effort — 2–5 minutes or even zero — since the lived-in texture is part of the look.
When it comes to trims, the regular cut needs a refresh every 6–8 weeks, while the shaggy version grows out gracefully and can go 8–10 weeks between cuts.
Vibe & Best Fit
The regular wolfcut leans into modern street-cool energy and suits all hair types. The shaggy wolfcut carries a retro rock and grunge aesthetic and works best on thick, wavy, or curly hair.
Bottom line: Go shaggy if you want raw texture, visible layers, low daily effort, and a 70s rock vibe — especially if you have thick hair. Stick to the regular wolfcut if you prefer something more polished and universally wearable.
Both cuts share the same wolf-inspired DNA — layers, volume at the crown, and that effortless rocker energy — but they diverge significantly in execution and feel.
Shaggy Wolfcut vs Shag vs Mullet: The Full Comparison
These four cuts often get confused, but each has a distinct personality once you break them down.
The Shaggy Wolfcut has short top layers, a longer back, and shaggy texture all over. It’s razor-cut with feathered, wild ends — and uniquely, it sits between retro and modern, making it the most versatile of the group.
The Classic Shag runs even layers throughout with a heavy fringe. The texture is choppy but more uniform than the shaggy wolfcut, and the overall vibe is firmly retro — think 70s rock.
The Wolfcut (regular) focuses on volume at the crown with wispy ends and a defined shape. Layers are blended rather than disconnected, which gives it a cleaner, more modern feel.
The Mullet is the most structurally distinct — short front and sides with length only at the back. It can be worn clean or textured, and while it’s having a strong retro comeback, it reads very differently from the shaggy cuts above.
The Butterfly Cut sits apart from all three with its two-tier structure: a short top layer and a long bottom layer. The texture is soft and flowing with a romantic, modern finish.
The Shaggy Level Scale: How Wild Do You Want to Go?
There’s no single shaggy wolfcut — it’s a spectrum from barely-there to full chaos. Where you land depends on your lifestyle, workplace, and personality.
Level 1 — Barely Shaggy: Light razor ends with subtle layer contrast and a relatively clean silhouette. Great for office settings or first-timers testing the look. Styling time around 10 minutes.
Level 2 — Softly Shaggy: Visible feathered ends with light interior thinning and a relaxed overall look. Works well for college or casual work environments. Takes about 5–8 minutes to style.
Level 3 — Classic Shaggy: A full razor cut with disconnected layers and wispy ends throughout. This is the sweet spot for most guys in most settings. Styling takes just 3–5 minutes.
Level 4 — Heavy Shaggy: Maximum interior thinning with very visible disconnection and wild layer contrast. Best suited for creative industries or nightlife. Needs only 2–3 minutes of styling.
Level 5 — Full Chaos: Extreme feathering, near-invisible blending, maximum volume, and all-over wildness. Made for musicians, artists, and bold personalities. Styling time is essentially zero — the messier, the better.
Best Hair Colors for a Shaggy Wolfcut (Matched to Specific Styles)
Color and cut are a team. Here’s which colors work specifically with which shaggy wolfcut styles, not just in general.
Natural Black works best with Goth, Emo, Anime-inspired, and Japanese styles. It makes layer depth and contrast maximally visible — the darkest, most dramatic option.
Ash Brown suits the Classic, Korean, Soft, and Tousled styles. Its neutral tone catches light beautifully through the layers without overpowering the cut.
Platinum Blonde pairs well with Modern Rockstar, Edgy, Choppy, and Spiky styles. The high contrast and drama amplify the wild texture of the cut.
Copper and Auburn are a natural match for 70s, Grunge, Skater, and Tousled styles. The warm tones enhance the retro, sun-worn aesthetic these cuts are built around.
Two-Tone (dark root with light ends) works especially well on Eboy, Medium, and Long styles. The grow-out pattern naturally highlights the disconnected layers as hair moves.
Raccoon Tail (alternating streaks) suits Eboy, Emo, K-Pop, and Anime styles. The streaks move visibly through the shaggy layers, making the texture even more striking.
Frosted Tips are best for Short, Mini, Choppy, and Textured styles. They draw attention specifically to the feathered ends, which are the signature detail of these cuts.
Peekaboo Color works beautifully on Long, Wavy, Curly, and Tousled styles. Hidden under the top layer, the color is only revealed as the hair moves — a subtle but eye-catching effect.
Blonde Balayage pairs well with Wavy, Grunge, Skater, and Rockstar styles. The sun-kissed dimension suits the lived-in, effortless vibe these cuts are known for.
How to Style a Shaggy Wolfcut: 3 Routines for Different Scenarios
The shaggy wolfcut offers three genuinely different finished looks depending on how much time you put in.
Routine 1: The Zero-Effort Morning (Under 5 Minutes)
- Wet the hair slightly with a spray bottle — just enough to activate the layers, not dripping.
- Apply one pump of sea salt or texture spray. Scrunch from ends upward.
- Run fingers through the hair once in a rough backward motion.
- Don’t look in the mirror again. Walk out. It looks better than you think.
This works because the cut is designed to look good with minimal intervention. The disconnected layers create visual interest on their own.
Routine 2: The Styled Messy Look (10–15 Minutes)
- Towel-dry damp hair gently. Pat and scrunch, don’t rub.
- Apply volumizing mousse from roots to mid-lengths. Avoid the ends.
- Flip head upside down and rough-dry on medium heat for 2–3 minutes using fingers.
- Flip upright. Work matte clay through the top section in separate pulling motions to isolate each layer.
- Don’t touch for 10 minutes while it fully cools and sets.
Routine 3: The Clean Finish (15–20 Minutes)
- Apply lightweight styling cream to damp hair throughout.
- Blow-dry with a round brush from roots outward, rolling the ends under slightly.
- Focus the round brush on top layers, smoothing each section as you dry.
- Finish with a tiny amount of water-based pomade pressed over the surface without disturbing the layers underneath.
This keeps the shaggy structure but gives the surface a polished finish that reads as professional in almost any setting.
How to Style a Shaggy Wolfcut: 3 Routines for Different Scenarios
Here’s the technical breakdown — what to say in the chair and why it matters.
The 5 Techniques That Create Shaggy Texture
1. Razor Cutting
A hair-cutting razor is dragged along the hair shaft rather than cutting straight across, creating soft tapered ends that feather outward rather than sitting blunt.
It’s the most important technique for the shaggy wolfcut. Not every barber uses it regularly — always ask upfront whether they’re comfortable with razor cutting.
2. Point Cutting
The barber holds sections vertically and cuts into the ends at a downward angle rather than horizontally.
This removes bulk in an irregular pattern, creating choppy textured tips that move independently. The more aggressive the point cutting, the wilder the ends.
3. Slide Cutting
Scissors slide along the hair shaft rather than making a single clean snip.
This thins and texturizes simultaneously, creating soft graduated weight removal throughout the length rather than just at the ends.
4. Interior Thinning
Thinning shears worked through the mid-shaft of each section — not the ends — to remove internal bulk. This allows heavy hair to breathe and the layers to separate naturally.
Without interior thinning the shaggy wolfcut on thick hair looks like a solid mass regardless of how good the surface looks.
5. Disconnected Layering
Rather than blending each layer smoothly into the next, the barber intentionally leaves visible contrast between sections.
This disconnection is what creates the dramatic multi-level appearance when you look at the shaggy wolfcut from the side or above.
The Exact Script to Say to Your Barber
- “I want a shaggy wolfcut. Please use razor cutting on the ends throughout — not just point-cut scissors.”
- “I want heavy interior thinning from the mid-shaft, especially through the crown section.”
- “Please keep the layers disconnected — don’t blend them smoothly. I want the contrast to be visible.”
- “The ends should be wispy and feathered, not blunt.”
- “Keep a clear length difference between the shaggy top and the sides.” (Adjust if you want a fade.)
Bring a reference photo. Even with this exact script, a visual reference ensures you and your barber are imagining the same finished result.
Common Barber Mistakes on Shaggy Wolfcuts
Knowing what can go wrong helps you walk out with exactly what you want.
Over-blending the layers is the most common issue — the result looks like a regular layered style rather than anything shaggy. To prevent it, tell your barber upfront to keep the layers disconnected.
Using scissors only leaves the ends looking blunt and the texture heavy. Request razor cutting explicitly before the cut begins, not halfway through.
Cutting the layers too short creates a choppy result with no flow or movement. Bring a reference photo and tell your barber to err on the longer side if unsure.
Skipping interior thinning causes thick hair to sit flat and heavy, killing the volume the cut depends on. Ask for interior thinning specifically — many barbers skip it unless prompted.
A hard fade under the shaggy top creates a disconnected look, as if two separate haircuts landed on the same head. Ask for a soft blend zone between the fade and the layers instead.
Not checking the back before leaving is an easy mistake to avoid. Always ask for the hand mirror at the end so you can confirm the length and blending from behind.
Shaggy Wolfcut Maintenance: Week-by-Week Reality
Weeks 1–2 are the honeymoon phase. The wispy ends are at their best, layers are fully disconnected and visible — just style it and enjoy it.
Weeks 3–4 the cut still looks great, with layers only beginning to soften slightly as the ends grow out. Sea salt spray daily keeps the texture alive and no changes are needed yet.
Weeks 5–6 the layers start to merge slightly at the ends, though it still looks intentional. Use a little more product than usual to keep the layers separated. A dusting trim on the ends only is worth considering.
Weeks 7–8 the disconnection has softened noticeably and the style is transitioning. Book a trim — refreshing the razor work and interior thinning brings it right back.
Weeks 9–10 the cut is growing into a softer, more uniform layered look and most of the shaggy quality is gone. Either trim back to reset it or embrace the grow-out as a softer layered style.
Week 11 and beyond the cut evolves naturally into something new. Let it grow and see where it goes, or book a full reshape with your barber.
The shaggy wolfcut has no ugly grow-out phase. The disconnected layers soften gradually rather than collapsing suddenly, which means you get more time between trims than most other textured cuts.
Best Products for a Shaggy Wolfcut
Matte texture clay is ideal for defining and separating layers on dry or damp hair. Look for low shine, medium hold, and a flexible finish.
Sea salt spray is the go-to for a zero-effort morning routine that enhances natural texture. Look for a lightweight formula that leaves no crunchy residue.
Volumizing mousse works best for fine hair and blow-dry routines where you need to build foundation volume. Choose a weightless formula that doesn’t flake.
Curl cream is made for curly and wavy shaggy wolfcuts where frizz control matters. Look for something humidity-resistant that defines without hardening the hair.
Fiber paste suits short-to-medium shaggy wolfcuts that need high separation. Strong hold, matte finish, and workable throughout the day is what to look for.
Water-based pomade works well for a clean finish in professional settings. Easy washout with low-to-medium hold is the key feature.
Texture or dry shampoo powder is ideal for thin hair, root lift, and refreshing the style on day two or three. Look for micro-fine particles with a clear finish.
Heat protectant spray applies to any heat styling on any texture — no exceptions. Use it before every single heat session.
One rule applies to all of these: less is always more. The shaggy wolfcut is designed to look good with minimal product, and heavy-handed application kills the airy, feathered quality that makes the style work.
Face Shape Guide for the Shaggy Wolfcut
Oval faces have the most flexibility. Almost any variation works — Classic, Long, and Curtain Bangs are all ideal. No major adjustments are needed, so feel free to go wild with the style.
Round faces do best with Long Shaggy, Taper Fade, and No-Bangs or Side-Swept Bangs variations. The goal is volume on the crown with layers falling downward rather than outward. Avoid heavy fringes and very wide side volume.
Square faces suit Soft Shaggy, Curtain Bangs, and Wavy versions. Soft layers help round the jaw and bangs soften the forehead. Avoid very short, blunt-layered versions that emphasize the jaw’s angularity.
Heart faces benefit from Medium Length styles and a Heavy Fringe, which adds visual width toward the jaw. Keep volume toward the jaw area and avoid a very voluminous crown with minimal length at the bottom.
Oblong or Long faces work best with Short or Medium Shaggy styles, a Heavy Fringe, and side width. Add side volume and avoid too much crown height, which makes the face appear even longer. Very long versions of the cut should also be avoided.
Diamond faces suit Soft Shaggy, Curtain Bangs, and Medium Length styles. Forehead coverage with bangs helps, and temple volume should be kept minimal. Avoid very wide side layers that increase cheekbone width.
FAQs
Final Thoughts
The shaggy wolfcut is not just a messier version of the wolfcut. It’s a technically distinct hairstyle built on specific razor and layering techniques that create a finish no other cut can replicate.
It works on almost every hair type and face shape. It requires less daily effort than almost any other styled men’s haircut. It grows out beautifully with no awkward phase.
Every style on this list comes with a barber note so you know what to ask for and a styling tip so you know what to do when you get home — because knowing both is the difference between a great shaggy wolfcut and just a messy haircut.
For the full range of wolfcut styles beyond the shaggy variations, visit our complete wolfcut men guide.